

Have you ever encountered a state of affairs the place you want to format a drive however the conventional strategies appear to fail? Fear not, as on this information, we are going to discover an alternate solution to format a drive utilizing Command Prompt and DiskPart. While it might sound intimidating, this technique affords extra management and suppleness, permitting you to carry out superior formatting choices. So, let’s dive in and uncover tips on how to format a drive utilizing these highly effective command-line instruments.
Understanding Command Prompt and DiskPart
Before we proceed with the formatting course of, it’s important to grasp the instruments we’ll be utilizing. Command Prompt is a command-line interpreter that means that you can work together together with your laptop by typing instructions. It offers a solution to execute numerous duties, reminiscent of managing information, operating packages, and configuring system settings.
Advertisement – Continue studying beneath
DiskPart, however, is a command-line disk partitioning utility that lets you handle storage units, together with formatting drives, creating partitions, and assigning drive letters.
Related: How to format USB drive or Memory card on Chromebook
Note
When utilizing Command Prompt and DiskPart, it’s vital to train warning as any incorrect instructions or operations can result in information loss. Make certain to double-check your instructions and again up any vital information earlier than continuing.
Now that we’ve got a primary understanding of the instruments concerned, let’s transfer on to the subsequent part to learn to format a drive utilizing Command Prompt and DiskPart.
Formatting a Drive Step-by-Step
Step 1: Open Command Prompt
To start, open Command Prompt by urgent the Windows key + R, typing “cmd” within the Run dialog field, and hitting Enter. This will launch the Command Prompt window.
Advertisement – Continue studying beneath
Step 2: Launch DiskPart
In the Command Prompt window, sort “diskpart” and press Enter. This will begin the DiskPart utility, and also you’ll see a brand new immediate that claims “DISKPART>”.
Step 3: List Available Disks
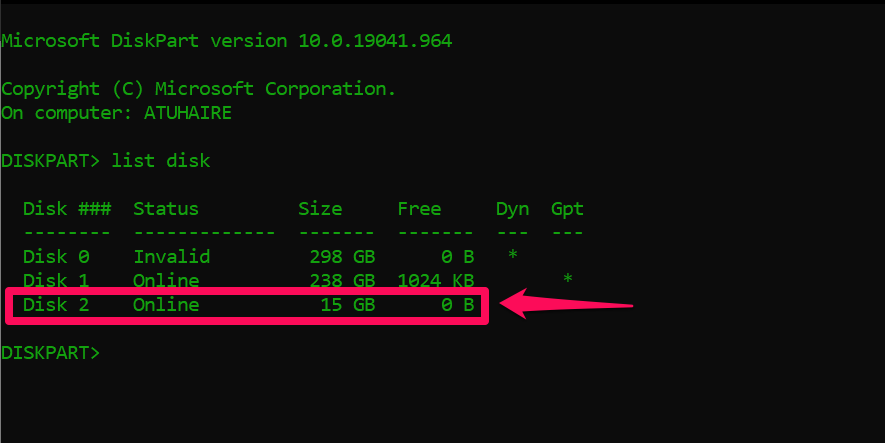
Type “record disk” within the DiskPart immediate and press Enter. This command will show a listing of all of the disks related to your laptop.
Related: How to Correctly Format a USB Drive for Your TV
Step 4: Select the Drive to Format
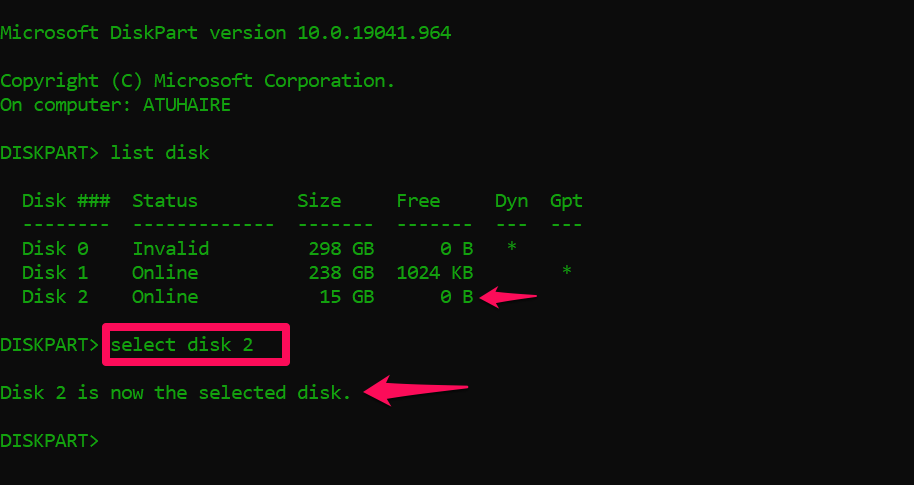
Identify the disk variety of the drive you wish to format from the record. For instance, if you wish to format disk 1, sort “choose disk 1” and press Enter. Be certain to pick out the proper drive(flash) by checking its storage, you’ll be able to insert & re-insert to make certain.
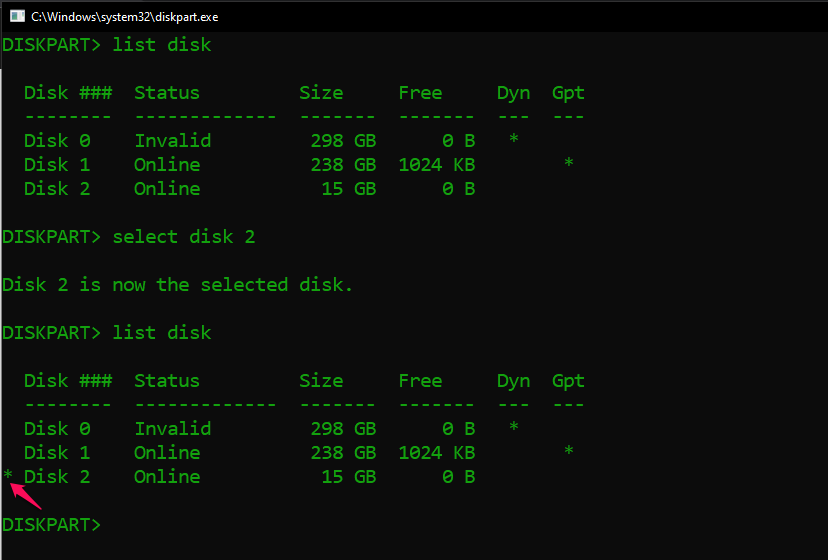
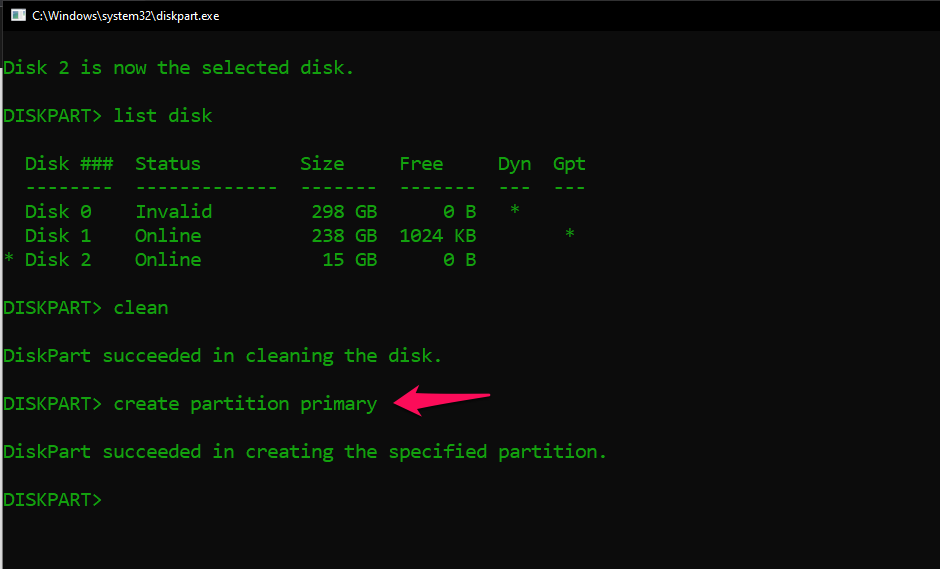
If you record once more (record disk), it’s going to have an asterisk earlier than it; record disk
Step 5: Clean the Drive
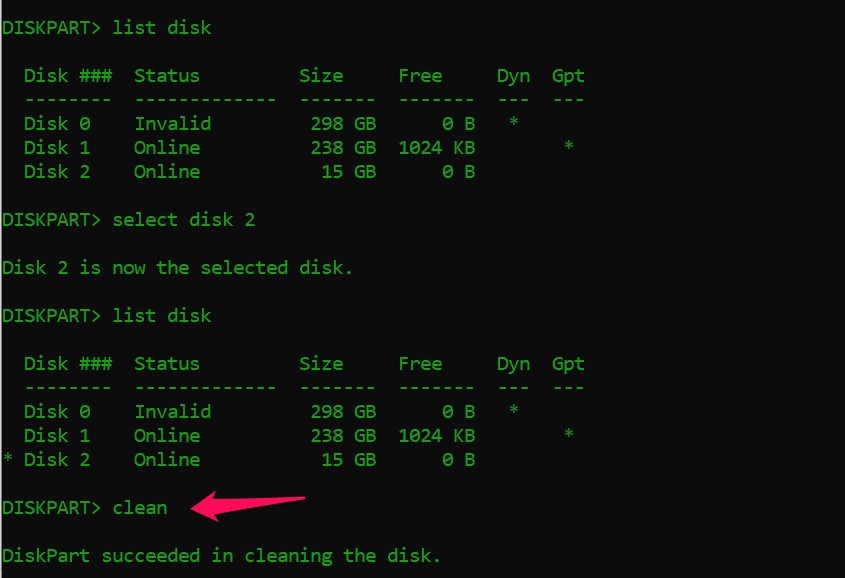
Once you’ve chosen the disk to format, sort “clear” and press Enter. This command will take away all partitions and volumes on the chosen drive, successfully wiping its content material.
Step 6: Create a New Partition
Next, sort “create partition main” and press Enter. This command will create a brand new main partition on the drive. This permits us to have the ability to retailer information or info on the drive.
Step 7: Format the Partition
To format the newly created partition, sort “format fs=ntfs” and press Enter. You can substitute “ntfs” with “fat32” or every other desired file system, relying in your necessities. This will take some good time since we aren’t utilizing the quicker choice;
Advertisement – Continue studying beneath
Step 8: Assign a Drive Letter
To assign a drive letter to the formatted partition, sort “assign letter=X” (substitute “X” together with your desired drive letter) and press Enter. This will make the drive accessible via the assigned letter in File Explorer.
Step 9: Exit DiskPart
Finally, to exit DiskPart, sort “exit” and press Enter. You can now shut the Command Prompt window.
Wrapping Up
Formatting a drive utilizing Command Prompt and DiskPart could seem advanced at first, however when you perceive the method, it turns into a strong software for managing your storage units. Remember to train warning and double-check your instructions to keep away from any unintended information loss. Do tell us within the command part if in case you have discovered this text useful.
Discover extra from Dignited
Subscribe to get the most recent posts despatched to your e mail.